
Table of Contents
- Why Small Bathroom Renovations Demand Smart Design
- 1. Install a Floating Vanity to Reclaim Floor Space
- 2. Convert Your Tub to a Walk-In Shower: Benefits and Layout
- 3. Small Bathroom Layout Optimization Through Strategic Fixture Placement
- 4. Use Large-Format Tile and Schluter KERDI Waterproofing for Small Bathrooms
- 5. Maximize Vertical Storage and Minimize Visual Clutter
- 6. Choose Lighting and Mirrors to Create an Open and Inviting Atmosphere
- 7. Select a Neutral Colour Palette and Reflective Surfaces
- Frequently Asked Questions
Last Updated: September 24, 2026
Why Small Bathroom Renovations Demand Smart Design
Small bathrooms present a unique challenge: maximizing function and comfort within tight square footage. The 7 best bathroom renovation ideas for small spaces aren’t about cramming in more fixtures; they’re about strategic choices that make every inch work harder. At White Rock Handyman & Renovations, we’ve completed many small bathroom transformations, and the most successful projects share a common thread: they prioritize space-saving solutions without sacrificing style or usability. Our 37+ years of experience across Surrey, White Rock, Langley, and Delta have shown us that the difference between a cramped, cluttered bathroom and one that feels open and inviting comes down to fixture placement, storage strategy, and visual design. When you’re working with limited square footage, each decision compounds. A floating vanity doesn’t just look modern; it creates genuine floor space and improves sightlines. A walk-in shower replaces a bulky tub-and-surround combination. Large-format tile reduces visual clutter. These aren’t cosmetic upgrades; they’re structural choices that fundamentally change how the space functions and feels.
Most homeowners assume small bathroom renovations require compromise. They don’t. With the right approach, you can achieve a bathroom that’s both functional and beautiful, regardless of square footage. White Rock Handyman & Renovations operates with full WorkSafeBC clearance, $5 million in Commercial General Liability (CGL) insurance, and municipal business licenses across our core service communities.
1. Install a Floating Vanity to Reclaim Floor Space
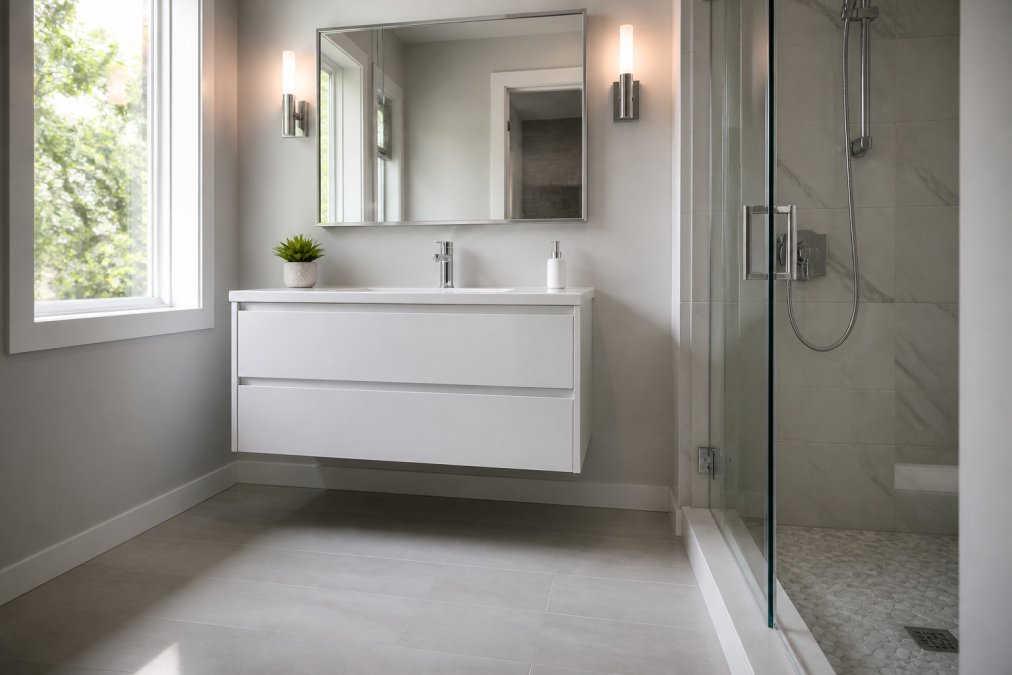
A floating vanity is one of the most effective space-saving strategies for small bathrooms. By mounting the vanity to the wall rather than sitting it on the floor, you create open space underneath, space that makes the bathroom feel larger and easier to clean. This approach is particularly beneficial for maintaining clear sightlines and improving the sense of spaciousness.
Wall-mounted vanities work particularly well in powder rooms and ensuite bathrooms where floor area is at a premium. The open space beneath draws the eye down and across the room, creating a sense of visual depth. This psychological effect matters more than you might think when you’re working with limited square footage.
Consider vanity width and depth carefully. A standard width for small bathrooms is typically between 24 and 30 inches, while a depth of 16 to 18 inches keeps the fixture from protruding too far into the room. Pair your floating vanity with an undermount sink to eliminate the rim that typically collects dust and water spots. The result is cleaner lines and easier maintenance.
Storage efficiency matters here too. Choose a vanity with drawers rather than open shelving to keep toiletries and supplies out of sight. Wall-mounted medicine cabinets above the vanity add vertical storage without consuming floor space.
2. Convert Your Tub to a Walk-In Shower: Benefits and Layout
Tub-to-shower conversions are one of the most impactful renovations for small bathrooms. A traditional bathtub-and-surround combination consumes significant floor space and visual weight. A walk-in shower, by contrast, creates a simplified, open feel while delivering genuine functional benefits. This conversion is a specialty of White Rock Handyman & Renovations, enhancing both aesthetics and accessibility.
The layout shift can be substantial. Replacing a traditional bathtub with a well-designed walk-in shower can reduce visual bulk, improve accessibility, and make a small bathroom feel considerably more open..
Walk-in showers also offer accessibility advantages. Stepping over a tub rim is a fall risk, particularly for aging homeowners. A curbless or low-curb shower design improves safety and usability for all ages and mobility levels.
When designing your walk-in shower layout, consider these factors:
- Entry configuration: Frameless glass doors or open entries maximize sightlines.
- Shower pan and curb: A low-profile pan (2 to 4 inches) or curbless design maintains visual flow.
- Fixture placement: Wall-mounted showerheads and controls free up counter space.
- Waterproofing: Schluter KERDI systems prevent water damage and ensure long-term durability.
A tub-to-shower conversion, when part of a standard or small bathroom renovation, is typically completed in just one week (5-7 business days) thanks to our dedicated one-project-at-a-time model. The timeline for more complex projects depends on whether structural changes are needed, material availability, inspections, and whether permits are required in your municipality.
3. Small Bathroom Layout Optimization Through Strategic Fixture Placement
Layout optimization is where many small bathroom renovations succeed or fail. The placement of your toilet, vanity, and shower determines traffic flow, usability, and how spacious the room feels. White Rock Handyman & Renovations excels at creating functional layouts tailored to your space.
Start by identifying your room’s natural focal point, typically the wall opposite the entry. Position your most visually prominent fixture (usually the vanity or shower) on this wall. This draws attention to the back of the room and creates depth.
Keep the toilet away from the entry door. If visible immediately upon entering, it dominates the visual space. Positioning it to the side or in a corner makes the bathroom feel less cramped.
Maintain clear sightlines between fixtures. A bathroom where you can see from the vanity to the shower to the toilet without obstruction feels larger than one where fixtures are clustered. Spacing matters more than you might expect.
Consider these layout principles:
- Minimum clearance: Allow at least 24 inches in front of the toilet and 24 inches in front of the vanity.
- Shower placement: Position against the longest wall when possible to maximize usable space.
- Ventilation: Ensure your exhaust fan placement doesn’t conflict with fixture layout.
- Lighting zones: Plan electrical placement to avoid fixture shadows.
Strategic fixture placement reduces visual clutter and improves functionality. A well-organized small bathroom often feels larger than a poorly organized medium-sized one.
4. Use Large-Format Tile and Schluter KERDI Waterproofing for Small Bathrooms
Large-format tile is a game-changer for small bathrooms. Where traditional 12×12 or smaller tiles create visual fragmentation, large-format tiles (24×24 inches or larger) reduce grout lines and create continuous visual flow. This technique is a cornerstone of our custom tile work at White Rock Handyman & Renovations.
Fewer grout lines mean fewer visual interruptions. The eye travels across the wall more smoothly, creating an impression of greater space. This is particularly effective on shower walls and bathroom floors.
Large-format tile also simplifies maintenance. Fewer grout lines mean less surface area to clean and less opportunity for mold or mildew growth. While sealed grout still requires attention, the reduction in linear feet of grout makes a practical difference over time.
Schluter KERDI waterproofing systems are essential for tile longevity, particularly in walk-in showers. KERDI membrane prevents water penetration behind tile, protecting substrate and framing. This is a critical component of our waterproofing expertise.
When selecting tile for small spaces, consider these factors:
- Color: Neutral palettes (whites, light grays, soft beiges) reflect light and feel more spacious.
- Finish: Matte finishes reduce glare; glossy finishes can feel reflective and slightly smaller.
- Grout color: Match grout to tile color to minimize visual breaks.
- Placement: Extend tile up the wall to draw the eye upward and increase perceived ceiling height.
5. Maximize Vertical Storage and Minimize Visual Clutter
In small bathrooms, vertical space is your most valuable real estate. Walls extend upward; floor space doesn’t. Maximizing vertical storage keeps clutter off surfaces and maintains the open, spacious feeling you’ve worked to create. White Rock Handyman & Renovations incorporates smart storage solutions into every design.
Consider these vertical storage solutions:
- Medicine cabinet: Recessed into the wall above the vanity.
- Floating shelves: Above the toilet or beside the vanity.
- Shower niches: Recessed into the shower wall (requires Schluter KERDI system).
- Wall-mounted towel racks: Frees floor space and keeps towels accessible.
- Corner shelving: Utilizes otherwise dead space.
6. Choose Lighting and Mirrors to Create an Open and Inviting Atmosphere
Lighting design fundamentally changes how a small bathroom feels. Bright, well-distributed light makes the space feel larger and more welcoming. Shadows and dim corners make it feel cramped. White Rock Handyman & Renovations ensures optimal lighting in every renovation.
Consider these lighting strategies:
- Overhead fixture: Recessed lights or a flush-mount ceiling fixture provide general illumination.
- Vanity lighting: Wall sconces on either side of the mirror eliminate shadows on the face.
- Task lighting: Adequate brightness for grooming (typically 75-100 watts equivalent).
- Accent lighting: Optional LED strips in niches or under floating vanities add visual depth.
- Mirror size: The larger the mirror, the greater the sense of space.
- Mirror placement: Position opposite or adjacent to light sources to maximize reflection.
7. Select a Neutral Colour Palette and Reflective Surfaces
Color psychology matters in small spaces. A neutral color palette, including whites, soft grays, light beiges, and pale blues, reflects light and creates visual continuity. Dark colors absorb light and make small spaces feel smaller. White Rock Handyman & Renovations helps clients select palettes that enhance their space.
Consider these color and surface strategies:
- Wall color: Neutral, light-reflecting finish (eggshell or satin).
- Tile selection: Large-format, light-colored tile with minimal grout lines.
- Fixtures: Chrome, brushed nickel, or matte black (matte black works surprisingly well in small spaces with strong accent lighting).
- Accessories: Towels, mats, and decorative items provide color without overwhelming the space.
- Grout color: Neutral grout minimizes visual breaks between tiles.
Frequently Asked Questions
What are the most efficient layout changes for small bathrooms?
The most effective layout changes focus on eliminating visual clutter and maximizing usable floor space. Wall-mounted fixtures like floating vanities and toilets, corner-mounted storage, and strategic mirror placement all create the illusion of more room. A tub-to-shower conversion is one of the highest-impact changes, as it frees up significant floor area. Proper fixture placement and waterproofing—especially with systems like Schluter KERDI—ensures your layout works efficiently without compromising durability or code compliance.
Are walk-in showers suitable for small bathroom renovations?
Yes, walk-in showers are ideal for small bathrooms when designed correctly. They eliminate the visual bulk of a shower enclosure and can be customized to fit tight spaces. A curbless or low-curb design with proper slope and waterproofing makes the shower feel part of the overall space rather than a separate compartment. Large-format tiles and reflective surfaces in the shower area further enhance the sense of openness. Our team specializes in compact walk-in shower installations that maximize functionality without sacrificing safety or aesthetics.
How long does a small bathroom renovation typically take?
Standard and small bathroom renovations are typically completed in just one week (5–7 business days). This timeline is possible because we operate on a dedicated one-project-at-a-time model, with our crew focused exclusively on your project until completion. For more complex renovations involving custom tile work, Schluter waterproofing systems, or structural changes, the timeline may vary depending on material availability, inspections, and any unforeseen conditions discovered during the renovation. We provide a detailed timeline during your free estimate.
What should I avoid when renovating a small bathroom?
Avoid oversized fixtures, dark colour schemes, and poor lighting—all of which make small spaces feel cramped. Don’t ignore ventilation or moisture control, as small bathrooms are prone to humidity issues. Steer clear of cheap materials that won’t withstand moisture exposure; proper waterproofing with systems like Schluter KERDI is essential. Also avoid clutter-inducing storage solutions; instead, invest in vertical storage and wall-mounted cabinetry. Finally, don’t skip professional installation—improper plumbing or tile work can lead to costly repairs down the line.